Would you like to browse our deck tile products and accessories?
DIY
Modulette decking is designed with simplicity in mind. Like any product however, there are particular tricks to handling it and this useful knowledge can distinguish a slick installation from that of a disastrous one. Any reasonably skilled handyman is capable of installing Modulette decking; With proper guidance and knowledge of our product, including the expert tips we offer in this section, your likely to tackle the job successfully. We highly recommend familiarizing yourself with the information below. Have a peek at the useful step by step manuals and video tutorial before proceeding with your project .
Basics
PREPARING THE SURFACE
Preparation of your surface can play a significant role in ensuring it's readiness to support the Modulette tile. By thoroughly clearing the floor of debris such as small stones, rough/chunky concrete and leaves, one can ensure that the steps taken to level each tile accordingly are accurate and free of anything that may impede your judgement whilst installing. Drainage can also pose a problem, (if debris is not discarded beforehand) for it can easily obstruct water flow. Our tiles are designed to contour a surface only; With that said, it is important that any foundation the product sits upon must be sturdy and safe. Furthermore, larger spaces such as gaps and voids can create a problem with stability. It is recommended that they be filled or repaired before proceeding with your installation. For specifics, please contact us and we’d be happy to guide you.
DIMENSIONING YOUR PROJECT
Measuring your surface area is an essential step in determining how much product you will require for your application. Keep in mind that each Modulette tile is identical and covers approximately 4 square feet of area. By measuring your depth and width one can quickly attain the square footage by multiplying these figures together (i.e. 20’x25’=500sq.ft). It is extremely important you take into consideration that each tile will distance 2 feet in both directions and for every uneven measurement (i.e. 7ft as opposed to 8ft) your calculations need to be rounded to the nearest two 2 feet (or tile). The reason for this has to do with the cutting; if the width of floor space is 7 feet then 8 feet of product will be required to make a cut on the last tile. We do not sell half tiles. Some spaces such as angled areas can be a bit more complex when it comes to measuring correctly. In situations like these, it is recommended you “square” off each area of the project with an imaginary line in order to get your square footage. See our reference manuals below for further instruction.
MATERIAL OF CHOICE
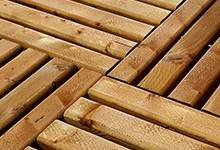
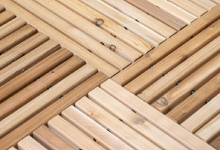
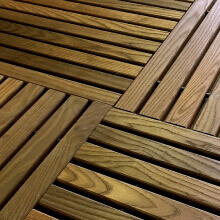
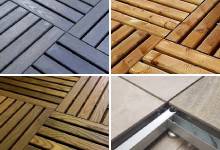
For the most part, your material of choice is a matter of personal preference. However, if you’re having difficulties deciding which product is best for your application, there are a few things you may want to consider. Our natural wood products have a limited warranty of 35 years against rot and decay, mildew, termites and fungus. As with most natural materials, they have a tendency to react to weathering. We use kiln dried material to prevent warping and cracking of the tiles however, this is a natural material and as such, cannot be controlled completely. Rest assured, we do repair under warranty should you experience these issues. Wood is warm to look at and versatile to work with.
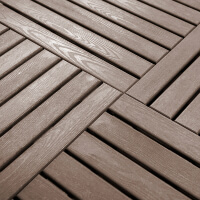
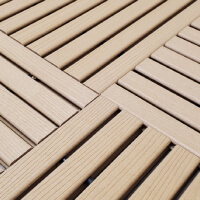
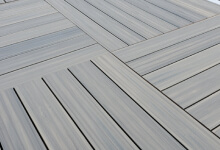
The recycled plastic product has a lifetime warranty for the duration of ownership against material defect. It comes in six earthy colors, giving you the ability to match or contrast a floor with the surrounding features of your home. It is easy to walk on and does not splinter. Our plastic tile has become a popular selection for these reasons but more importantly, for the minimal required maintenance. They are easily washed and most durable.
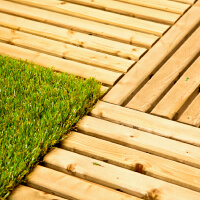
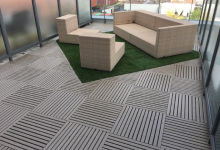
The grass tile, although designed to accessorize any of our products can also be applied as a complete entity to a surface. It is made of synthetic material that does not heat up on the feet and still looks shockingly real. The perforated backing ensures efficient drainage of rainwater. Maintenance is limited, easily allowing you the option of washing, sweeping and/or even raking the grass. It can be cut to any shape and designed as a feature area to compliment wood or plastic.
Design Considerations
MIX N’ MATCH
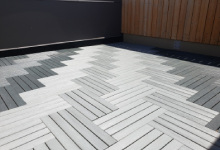
Any surface can be brought to life in a multitude of different ways. Mixing and matching colors is one of many concepts that tends to really jazz up an area. We commonly ad different coloured tiles to larger spaces in order to break up the monotony of a single shade on a large project. Grass can also act as an alternate by designing a feature area. As such, it helps brake up and/or labels a deck with two distinct usable areas (i.e. grass for you children or pets to play on, a tiled section for dining, lounging etc.).
PATTERN/STYLE
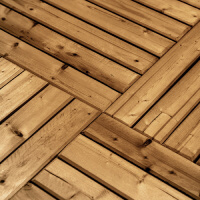
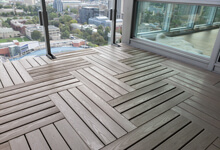
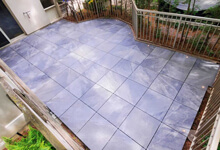
Although our modulette tiles are square in dimension, the possibilities are endless when it comes to pattern and style. This is merely a matter of personal preference and we have the pictures in our gallery to help you with your decision. Your options include running the tile in the same direction or commonly reversing them in a checkerboard format which we highly recommend. Direction is never limited, for it can be turned or positioned to fit different elevated areas such as a pre-existing backyard deck. Perhaps you’d like the tiles on a 45 degree angle? It’s definitely possible and worth the effort, but will require more material and planning.
BUILDING TO CODE
Every renovation has its guidelines. We recommend you check your building’s requirements and restrictions and familiarize yourself with municipal/provincial/state codes and by-laws before proceeding.
Tool Requirements
HANDHELD
- Tape Measure
- Chisel (1-1 half inch)
- Exacto Knife
- Flat Head Screwdriver
- Pencil or Marker
- Ear Plugs
- Eye Protection
- Gloves
POWER
- 7.5" Skillsaw (13 amp or more)
- Jigsaw (13 amp or more)
- Drill (if securing is required)
SPECIALIZED
- Compressor
- 25-50 ft. Air Hose
- Caulking (PL9000 recommended if gluing is required)
Installation Manuals

MODULETTE DECK TILES
A detailed step-by-step visual reference for installing yourself. Includes instruction on levelling, basic and advanced cutting techniques and many more useful tips.
Download PDF
GRASS INSERTS
A detailed step-by-step visual defence for installing yourself. Includes instructions on levelling, basic and advanced cutting and attaching the grass material. Included are useful tips for creating aesthetic appeal.
Download PDF